Showing posts with label greeting cards. Show all posts
Showing posts with label greeting cards. Show all posts
Tuesday, November 4, 2014
New Baby Custom Greeting Card
Got this card stock on clearance at Askew Taylor. While it folds neatly without the need for tools, you can accomplish the same with regular letter size card stock and a bone folder.
Drew this design while waiting at the Duke Medical Center with a Sakura Pigma Sensei 06 pen, and chose to color it with my Uni watercolor pencils (which are pretty much identical to Faber Castell Albrecht Durer watercolor pencils).
Decided to leave the colors dry, so I did not use a waterbrush to blend the colors like I often do. You can get pretty saturated colors just by pressing a bit harder with these pencils.


Friday, June 6, 2014
Custom "Thank You" card
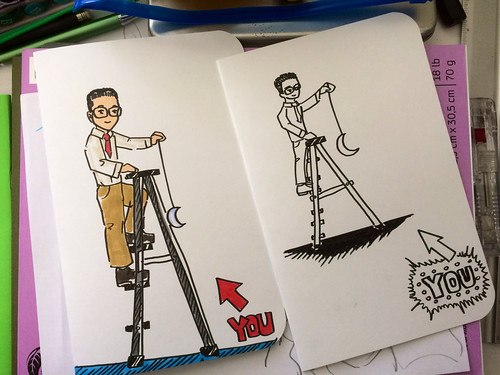
Just a quick job I did over the phone. Got the request to sketch a thank you card for someone that had gone above and beyond at work, so the concept is "handsome nerdy" guy that hang the moon in the sky for the thankful recipient. The request was for a black and white illustration after the client couldn't find the exact card she wanted at Hallmark. The line work was drawn with my trusted Sakura Pigma Sensei 06 pen. Since I had many of my coloring tools laid out on my drafting table already, the color version was done for fun. I applied a Copic Sketch marker for the skin tone, Faber Castell Pitt Big Brush artist pens for the clothing and lettering, and a Prismacolor Premier double ended marker for the ground.
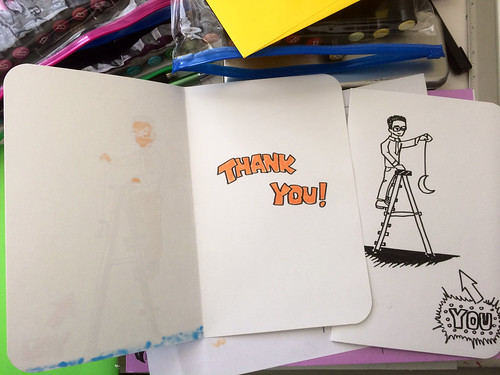
The advantage of the pigmented India inks of the Pitt pens is that they do not bleed through the back of the card stock. The alcohol based inks of the Copic Sketch and Prismacolor show through the back of the front of the card. Making custom greeting cards, is a good project for budding artists to exercise their illustration skills and apply their creativity in giving shape to their clients visions. You can have your kids work on birthday cards, thank you notes, and holiday greeting cards on rainy days, so that they do not have to rush through at the last minute.
Friday, December 20, 2013
Making Pop-Up Holiday Cards
Woot! 400th Post!
Materials and tools used:
- White and Red card stock.
- Glue sticks or YES paste.
- Bone folder
- Round corner paper punch
- Pentel Outline pen
- Cutter Bee Precision-cut scissors.
Make sure pop-up tabs are big enough (around 1" X 1"), so that there is plenty of surface to attach the pop-up character.
The Pentel Outline pen was used to draw simple backgrounds and to draw a silver outline around the pop-up characters and props.
The individual characters and background elements on white card stock were trimmed with the Cutter Bee Precision-cut scissors.
Characters were colored with Copic Sketch markers.
Happy Holidays!
Materials and tools used:
- White and Red card stock.
- Glue sticks or YES paste.
- Bone folder
- Round corner paper punch
- Pentel Outline pen
- Cutter Bee Precision-cut scissors.
Make sure pop-up tabs are big enough (around 1" X 1"), so that there is plenty of surface to attach the pop-up character.
The Pentel Outline pen was used to draw simple backgrounds and to draw a silver outline around the pop-up characters and props.
The individual characters and background elements on white card stock were trimmed with the Cutter Bee Precision-cut scissors.
Characters were colored with Copic Sketch markers.
Happy Holidays!
Friday, December 21, 2012
Pop-Up Holiday Cards

1. Created a coloring template of 9 characters on a 8.5" X 11" sheet of card stock.
2. Used my favorite coloring tool (you could use crayons, colored pencils, or other markers) or you can even leave the characters in black and white, so that the recipient could have some fun coloring them. I like using Copic Sketch markers and a Pentel silver outline pen for highlights.
3. Carefully cut the colored characters and affix them to the pop up tabs of a 6" X 9" colored card stock folded in half to yield a 6" X 4.5" card. Glued a second card for extra support and to cover the void left by the pop-up tabs.
3. Rounded the card edges and they are ready for customizing and mailing them out.
For some of my templates that you could print and customize for your own use check this previous post.
Thursday, April 7, 2011
Family Art Night Activity Sneak Preview - Pop-Up Card and Cut Out Templates Test run
I have prepared a few greeting card pop-up card templates with "Mother's Day" and "Happy Easter" themes along with a few options of cute cut outs that will actually pop-up when the cards are opened. Will have markers and foam stickers for further customization at an upcoming Family Art Night event at the Boys & Girls Club on the 13th of this month. For a quick test run, I used them on a recent art class for a High School group.
Trying out different coloring approaches.
 Sample finished card.
 Once students completed their first pop-up card and understood its simple mechanics, they started designing their own backgrounds. That's the main idea: get familiarized with the pop-up card creation process, and then let your imagination loose and create your own cards for different occasions.

Trying out different coloring approaches.
 Sample finished card.
 Once students completed their first pop-up card and understood its simple mechanics, they started designing their own backgrounds. That's the main idea: get familiarized with the pop-up card creation process, and then let your imagination loose and create your own cards for different occasions.
Tuesday, November 30, 2010
Making Holiday Cards int he After School Program
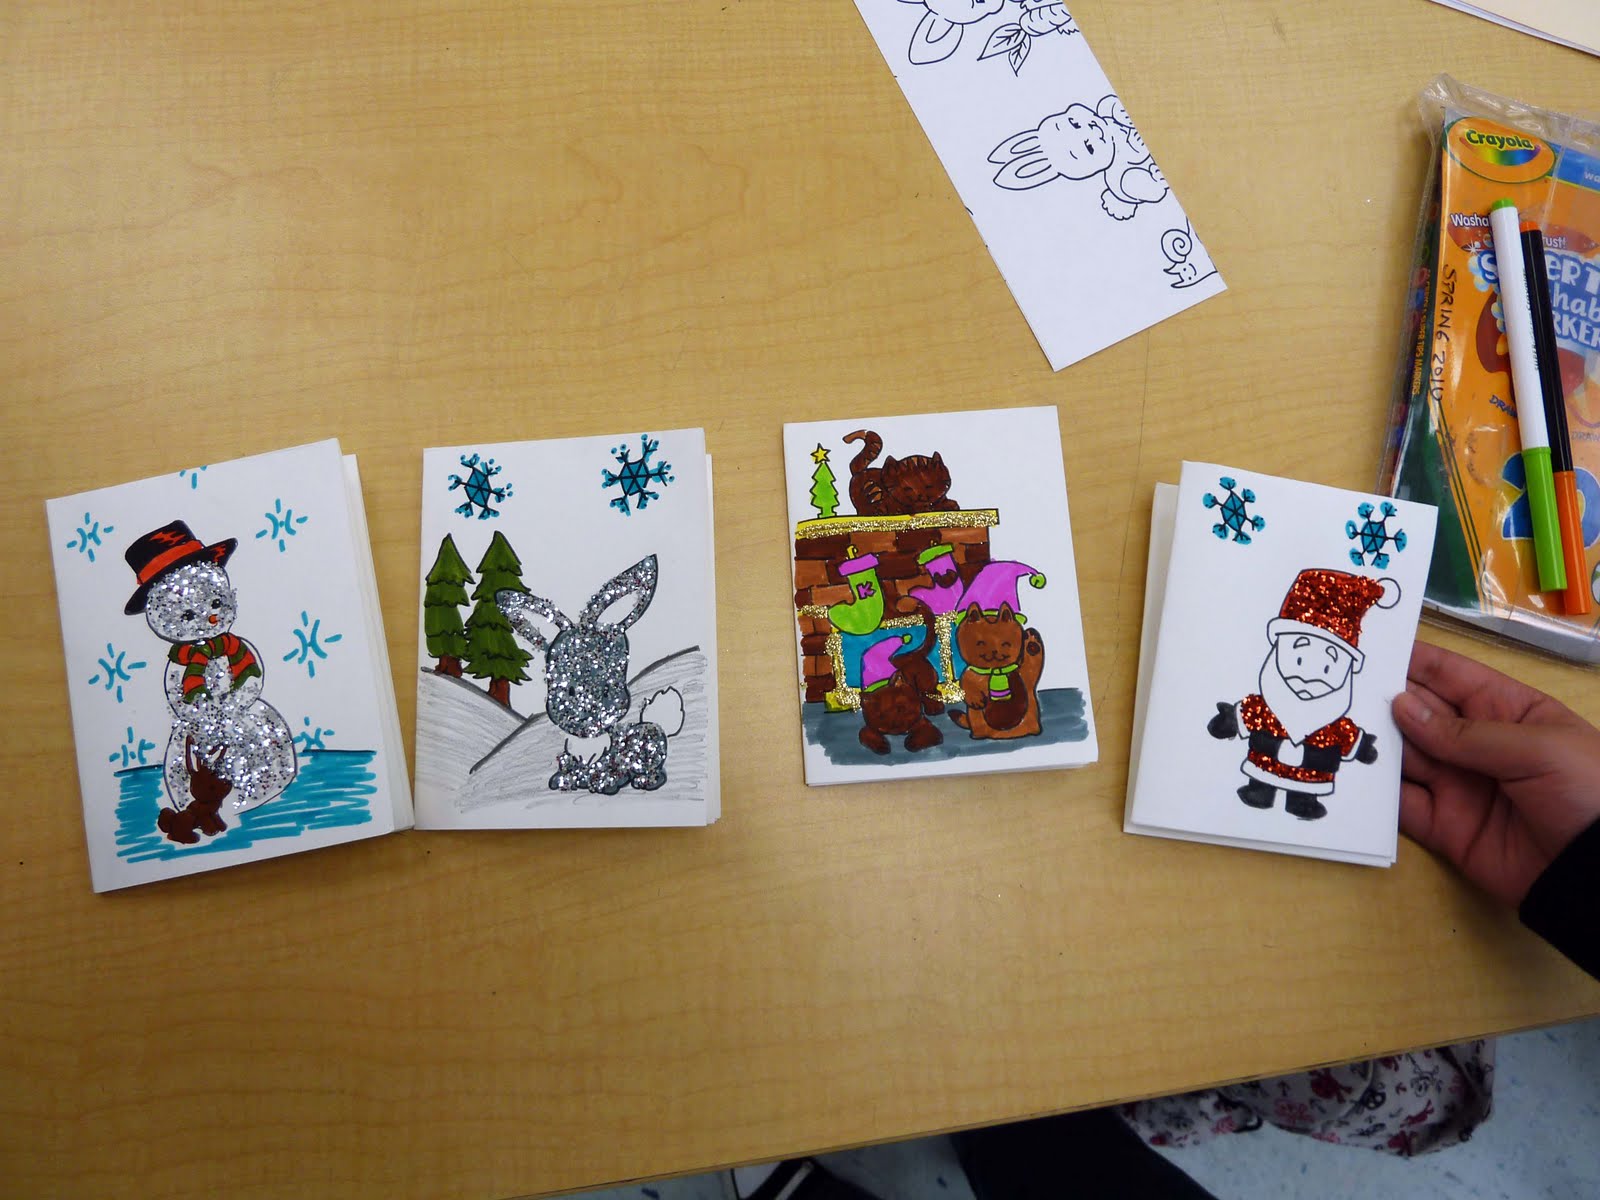
 With a selection of blank coloring cards and assortment of coloring tools the students had a chance to start building their collections of greeting cards for the upcoming holidays.
 Coloring with Crayola Super Tip Markers and Faber Castell Albrecht Durer watercolor pencils.
 Lead teachers monitoring a group of students as they try out the coloring tools and card templates.
 Some whimsical coloring choices.
 Coloring with Derwent Watercolour pencils and using some of the finished samples for reference.
 Watercolor pencils used dry.
 Sprinkle of glitter for finishing touches.
Sunday, November 21, 2010
Holiday Card Coloring Templates
This holiday card project should prove suitable for Elementary and even some Middle School kids judging from the frequent requests I get for coloring activities. Holiday card samples colored with watercolor pencils used dry.
 Print any of the coloring templates below on white card stock. Add your personal greeting or draw additional decorative elements with a fine point black Sharpie marker pen. Color the black and white outlines with crayons or markers. Fold in half twice. Add some glitter glue for finishing touches. Let dry and get caught up with your holiday correspondence.


 Holiday card samples colored with watercolor pencils used dry.
 Print any of the coloring templates below on white card stock. Add your personal greeting or draw additional decorative elements with a fine point black Sharpie marker pen. Color the black and white outlines with crayons or markers. Fold in half twice. Add some glitter glue for finishing touches. Let dry and get caught up with your holiday correspondence.


Sunday, September 19, 2010
Custom Greeting Cards made with Art Markers


Tuesday, December 15, 2009
Bit of Speed Sketching for the Evening - Trial for a new Sketching tool
 While most of the students and their families decorated their holiday cards, I started taking requests for quick sketching demos. My trusted Sakura Pigma Sensei 0.6 mm pen which is my usual first choice for event sketching turned out not to be up for the task on account of being rather dry. Thus, I ended up switching to a black Copic Sketch marker outfitted with a medium round nib. This was the first actual field test for this customized sketching tool that I put together mainly for sketching cartoon portraits. Its line is much thicker than 0.6 mm, and proved quite suitable for drawing bold strokes quickly and smoothly. It is certainly a good choice for keeping up the sketching speed though it is difficult to render small details with it. Its other advantage is that Copic markers are refillable, so carrying a bottle of spare ink would ensure continuous reliable service even when the ink supply runs out halfway during an extended event.
 The first sketch request for the evening was for a picture of Strawberry Shortcake.
 Good thing dragons were requested often since they are one of the subjects that I can draw quite quickly. Since my family name means "Dragon" in Chinese (notice the dragon character printed on the back of my coat in the last photo of this entry), I am rather fond of them.
 Demonstrating how loosely stringing a few basic geometric shapes together can quickly convey the concept of a robot city that would fit in the Transformers universe.
 Since mermaids always seem to be a popular subject with Elementary and Middle School students, 2 of the available bonus sketching sheets featured them.
 I think this was the third mermaid cartoon portrait request for the evening, but I have to admit I lost track of the actual number of sketches I managed to produce on this evening.
 Tinkerbell was another popular request.
 Trying to explain the drawing and design process while sketching as many doodles as possible can be a challenge sometimes.
 Also recall doing a Sponge Bob, Patrick, Spiderman, and Winnie the Pooh quick sketches. Bit surprised nobody asked for a Batman sketch.
 Kept on drawing the students' requests until the very end of the Family Night event. I think most were pleased with their sketches though I was not able to undertake all of them in the time allowed. It was quite fun and looking forward to performing in similar venues in the future.
Photo Journal of the Card Making Station at the Family Night of the Boys & Girls Club - Parkside Elementary Edition
 Continuing the Family Night events for the Boys and Girls Club in cooperation with the United Arts Council, dad helped me set up the Holiday Card Making stations at Parkside Elementary on this evening.
 As a bonus creative activity, we had a selection of coloring and sketching worksheets set up behind the sample cards display.
 The full-size poster sleeves proved quite useful again in defining the work stations and facilitating clean up of the glitter station.
 We had a pretty good attendance to for the Family Night student performances and arts and crafts activities.

 Student coloring one of the dragon bonus sketching worksheets.
 The microphone came in quite handy to provide instructions clearly in English and Spanish at the beginning of the card making activities.
 Students and their parents working together on their holiday cards.

 Students coloring their holiday cards.


 The glitter station always seems to be a pretty big hit with the students, but I try to limit its use to events held in areas that are easier to clean up or contain like the cafeteria or outdoor venues. The experience of taking the card-making station down a second time in as many weeks convinced me to find a better way to store and manage the Crayola markers rather than continue to keep them separate in their original cardboard boxes. The latter is an exercise in futility, for it consumes a couple of hours just trying to reassemble the different color palettes in their respective boxes. Next event I will keep all of the markers in an extended tray or dedicated storage tub.
Subscribe to:
Posts (Atom)

 Posts
Posts