Borrowed the
Yudu Screen-Printing System from the
Jo-Ann store to make some custom t-shirts that could be used for in-store demos and promote upcoming
Cartoon Sketching trend classes. Two birds with one stone.

Creating a printing screen is fairly simple: the original art was drawn with
Sakura Pigma Sensei pens, scanned in the computer, and then printed in black on the dull side of the
Yudu blank transparency. This
Cartoon Sketching Manga-Style design transparency was taped to the light table, so that it could be transferred to the green emulsion on the printing screen. The green emulsion sheet was attached to the pre-moistened screen, and it took 3 drying cycles to get it ready for light exposure.After 8 minutes of light exposure the green emulsion turned blue in the unmasked areas.

Found it more efficient to wash away the unexposed emulsion in the shower. The rinsing process still took a fairly long time even with the hand held shower sprayer.

The sponge was useful for removing the unexposed water soluble emulsion (green film sections) away from the printing screen.

After a couple of drying cycles, the printing screen was taped and ready for its first test.

Loading a blank t-shirt on its platen. My first T-shirt print. Bit disappointed that much of the fine detail from the original got lost in the process, but I guess it turned out ok for a first try.

Managed to print a second t-shirt without cleaning the screen and only some minor smudging in the upper right corner of the image.

This third printing on smooth bristol without cleaning the screen in between resulted in even more paint smudging . Thus cleaning the screen thoroughly after each printing seems essential for producing crisp images. This printing process required a a lot of water for rinsing the unexposed emulsion and the printing screen between prints. A simpler graphic design with less fine detail could probably be reproduced more accurately. While the
Yudu system worked well enough and made the process of creating a printing screen simpler with its proprietary emulsion sheets, the unit itself is rather cumbersome with its rather large footprint and not very practical given the high cost of the starter kit and printing supplies. It was fun playing with it, but the search continues for a more practical and cost-effective alternative for printing custom t-shirts.
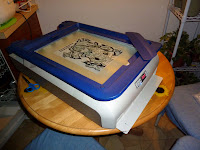
 Borrowed the Yudu Screen-Printing System from the Jo-Ann store to make some custom t-shirts that could be used for in-store demos and promote upcoming Cartoon Sketching trend classes. Two birds with one stone.
 Creating a printing screen is fairly simple: the original art was drawn with Sakura Pigma Sensei pens, scanned in the computer, and then printed in black on the dull side of the Yudu blank transparency. This Cartoon Sketching Manga-Style design transparency was taped to the light table, so that it could be transferred to the green emulsion on the printing screen. The green emulsion sheet was attached to the pre-moistened screen, and it took 3 drying cycles to get it ready for light exposure.After 8 minutes of light exposure the green emulsion turned blue in the unmasked areas.
 Found it more efficient to wash away the unexposed emulsion in the shower. The rinsing process still took a fairly long time even with the hand held shower sprayer.
 The sponge was useful for removing the unexposed water soluble emulsion (green film sections) away from the printing screen.
 After a couple of drying cycles, the printing screen was taped and ready for its first test.
 Loading a blank t-shirt on its platen. My first T-shirt print. Bit disappointed that much of the fine detail from the original got lost in the process, but I guess it turned out ok for a first try.
 Managed to print a second t-shirt without cleaning the screen and only some minor smudging in the upper right corner of the image.
 This third printing on smooth bristol without cleaning the screen in between resulted in even more paint smudging . Thus cleaning the screen thoroughly after each printing seems essential for producing crisp images. This printing process required a a lot of water for rinsing the unexposed emulsion and the printing screen between prints. A simpler graphic design with less fine detail could probably be reproduced more accurately. While the Yudu system worked well enough and made the process of creating a printing screen simpler with its proprietary emulsion sheets, the unit itself is rather cumbersome with its rather large footprint and not very practical given the high cost of the starter kit and printing supplies. It was fun playing with it, but the search continues for a more practical and cost-effective alternative for printing custom t-shirts.


 Posts
Posts


